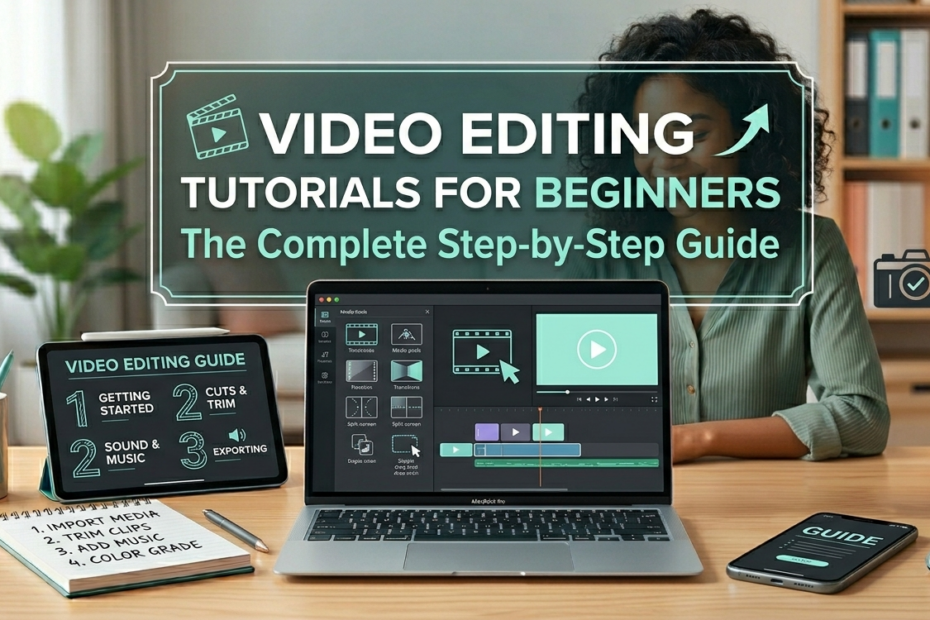
Video editing has become one of the most important digital skills in the world today. Whether you want to create YouTube content, edit TikTok videos, make short films, or produce marketing videos for a business, understanding how to edit videos properly opens the door to endless creative possibilities.
Not long ago, video editing was a skill limited to professionals with expensive equipment. Today, a laptop or phone is enough to begin your journey.
At its core, video editing is the process of arranging clips, adding audio, applying effects, and shaping a story. Great editing is not about flashy transitions or complicated techniques—it’s about guiding your viewer’s attention and creating a smooth, enjoyable experience.
This article will take you step-by-step through everything you need to know. Whether you’re a complete beginner or someone looking to improve, this guide has you covered.
Understanding the Video Editing Workflow
Before you open any editing software, it’s essential to understand the structure of a proper video editing workflow. Many beginners jump straight to adding effects, but professional editors know that editing is a process that becomes easier when you follow organized steps.
Importing & Organizing Footage
Good editing starts with good organization. Your media (video clips, images, graphics, and audio) should be placed in labeled folders. Many softwares allow you to create bins or collections. Keeping things organized helps avoid confusion later.
Rough Cut vs Final Cut
-
Rough Cut: The first version of your video. You simply place clips in order without worrying too much about perfection.
-
Final Cut: After adjusting timing, trimming clips, adding audio, fixing transitions, and polishing the visuals.
A strong workflow prevents you from feeling overwhelmed and makes your edits look more professional.
Choosing the Right Video Editing Software
Beginners often ask: “Which software should I use?” The truth is, great editing doesn’t depend on the software—it depends on your creativity. Below are the best options depending on your skill level and budget.
Free Video Editing Software
DaVinci Resolve
One of the most powerful free editors available. It includes advanced tools for color grading, audio design, and visual effects.
CapCut
Very popular among smartphone users. Perfect for TikTok and Instagram videos.
iMovie (Mac/iOS)
Simple, clean, and beginner-friendly. Great for basic projects.
Paid Software
Adobe Premiere Pro
One of the most widely used editors in the industry. Perfect for YouTube creators and professionals.
Final Cut Pro (Mac)
Fast, reliable, and optimized for Mac systems. Many filmmakers use it.
Filmora
A simpler alternative for beginners who want to level up without learning complex tools.
If you’re just starting, DaVinci Resolve or CapCut is usually the best choice.
Essential Video Editing Terminology
Understanding basic editing terms will make tutorials easier to understand.
-
Timeline – The area where you arrange and edit your clips.
-
Clip – A single piece of video or audio.
-
B-roll – Secondary footage used to support the main video (A-roll).
-
Transition – A visual effect used to move from one clip to another.
-
Keyframes – Markers that control changes over time (e.g., moving text).
-
Frame Rate – Frames per second (FPS). Common ones include 24 fps, 30 fps, and 60 fps.
-
Resolution – The size of your video (1080p, 4K).
-
Color Correction – Fixing exposure, white balance, and color accuracy.
-
Color Grading – Creating a stylistic look.
Learning these terms helps you communicate like a video editor.
Step-by-Step Guide to Editing a Video
Here’s a complete beginner-friendly process.
Step 1: Plan Your Video
Even simple videos benefit from planning. Ask yourself:
Good planning saves editing time.
Step 2: Import Media
Bring your clips, audio, and graphics into your editing software.
Step 3: Organize Files
Label your clips. Keep audio and video in separate folders.
Step 4: Create a Rough Cut
Place your clips in the correct order. Don’t worry about perfection yet.
Step 5: Add B-Roll
B-roll:
Step 6: Add Transitions
Avoid overusing fancy transitions. Simple cuts are often better.
Step 7: Add Text and Graphics
Use readable fonts. Keep text on screen long enough to be understood.
Step 8: Add Music & Sound Effects
Make sure the music matches the mood. Keep it lower than your voice-over.
Step 9: Color Correction
Fix exposure, contrast, and color balance.
Step 10: Export Your Video
Common export settings:
-
Format: MP4
-
Resolution: 1080p
-
Codec: H.264
Techniques Every Beginner Should Learn
Cutting on Action
Cutting during movement makes transitions feel smoother.
Match Cuts
Matching similar scenes creates pleasing continuity.
J-Cuts and L-Cuts
Audio from the next clip starts before the video changes (J-cut).
Or audio continues after the visual changes (L-cut).
Speed Ramping
Changing speed for dramatic effect.
Slow Motion
Great for emotional or dramatic scenes.
Stabilization
Reduces shaky footage.
Audio Ducking
Lower background music when someone is speaking.
Color Correction and Grading
Color Correction
This step ensures:
-
Proper exposure
-
Accurate skin tones
-
Balanced lighting
Color Grading
This gives your video a mood or style.
Examples:
-
Warm tones = cozy feeling
-
Cool tones = dramatic or serious
-
High contrast = bold cinematic look
LUTs can speed up the process, but learning manual grading gives better control.
Audio Editing Basics
Many beginners underestimate the importance of audio. In reality, viewers forgive imperfect visuals before they forgive bad audio.
Improve Your Audio By:
-
Removing hiss or background noise
-
Matching volume levels
-
Using high-quality music
-
Adding subtle sound effects for realism
-
Keeping voice-overs clear and crisp
Adding Effects and Transitions
Effects should support your story, not distract from it.
Good uses:
-
Title effects
-
Lower thirds
-
Motion graphics
-
Simple fade transitions
Avoid:
-
Overusing flashy transitions
-
Using too many sound effects
-
Adding unnecessary filters
Professional editors use effects sparingly to enhance emotional impact.
Exporting Your Video
Export settings affect video clarity and file size.
Recommended settings for beginners:
For YouTube, most editors export in 1080p or 4K.
Tips to Improve Faster
Practice with Small Projects
Try editing short clips, like:
-
Street videos
-
Nature footage
-
A simple vlog
Study Your Favorite Creators
Pause YouTube videos. Observe:
-
Their pacing
-
Transitions
-
Color styles
Learn Keyboard Shortcuts
It can make editing much faster.
Keep Your Editing Simple
Simple videos often feel more professional.
Stay Organized
Good organization saves time and avoids mistakes.
Conclusion
Video editing is not just a technical skill—it’s a creative superpower. Whether you want to start a YouTube channel, improve your social media presence, or move toward a professional editing career, the steps and techniques in this guide will help you build a strong foundation. The more you practice, the more confident you will become.
Every editor starts as a beginner. With consistency and creativity, you can grow into a skilled storyteller.
Frequently Asked Questions
How to start video editing step by step?
Starting video editing can feel overwhelming at first, but approaching it step by step makes the process manageable and enjoyable. The first step is to choose the right video editing software.
Beginners often start with free or user-friendly tools like iMovie, DaVinci Resolve, or Adobe Premiere Rush. Once you have selected software, familiarize yourself with the interface. Spend time exploring the timeline, media library, and basic editing tools like cut, trim, and transition effects.
The next step is importing your footage. Organize your clips into folders so you can easily locate them when needed. Good organization is essential as your project grows. After importing, review all your clips and identify the segments you want to use. This process is called “logging” or “selecting the best takes.”
Once your clips are selected, begin arranging them on the timeline in the desired sequence. Focus on creating a coherent story or flow. At this stage, don’t worry too much about perfect cuts; the priority is building the structure of your video. Once the rough cut is ready, refine each clip by trimming unnecessary parts, adjusting timing, and adding transitions for smooth flow.
The next step is adding audio. Start with background music, sound effects, or voiceovers. Make sure audio levels are balanced so dialogue or narration is clear. Then, enhance your video visually by adjusting colors, brightness, and contrast. Color grading can give your video a professional and consistent look.
Finally, add titles, captions, or graphics if needed. Once you feel satisfied, render the video and export it in the appropriate format for your platform. Throughout the process, practice is key.
The more you experiment with tools and techniques, the faster you will improve. Learning from tutorials, joining video editing communities, and studying professional edits can also accelerate your skills.
What is the 321 rule of editing?
The 321 rule of editing is a simple yet effective guideline for pacing and cutting clips in video editing. The rule is designed to keep the audience engaged by maintaining rhythm and avoiding long, drawn-out shots.
Essentially, the “321” rule encourages editors to think in terms of a countdown: three beats for establishing context, two beats for building interest, and one beat for delivering the main action or impact.
In practical terms, the first part, “3,” usually applies to longer clips that establish the scene. This could involve showing the environment, the character, or the setting to orient the audience.
The second part, “2,” involves slightly shorter shots that introduce movement or progression in the story, keeping viewers intrigued without overwhelming them. Finally, the “1” is the punch or main event—a short, sharp clip that delivers the climax of the action or the point of emphasis.
The 321 rule helps editors maintain a natural flow, preventing scenes from feeling too rushed or too slow. It is particularly useful in action sequences, social media content, or fast-paced storytelling where attention spans are short. By following this rhythm, the editor creates a sense of momentum that keeps the audience watching.
Although it is called a “rule,” it is flexible. Editors often adapt it depending on the mood, genre, and pacing of the video. Understanding this principle allows beginners and professionals alike to make conscious decisions about timing, pacing, and shot length, ultimately enhancing storytelling.
What are the 7 laws of editing?
The 7 laws of editing are foundational principles that guide editors in crafting smooth, coherent, and visually compelling videos. These laws, widely recognized in film and video production, ensure that transitions and cuts feel natural and enhance the story rather than distract viewers.
-
Continuity: Maintain visual and narrative continuity between shots. This means keeping consistent positions, actions, and screen direction so the audience doesn’t get confused.
-
Clarity: Every cut should make the story clearer. Avoid unnecessary or confusing transitions that distract from the main message.
-
Rhythm: Editing should have a rhythm that matches the tone and pace of the story. Fast-paced scenes may require quick cuts, while emotional or dramatic moments benefit from longer shots.
-
Emphasis: Use editing to highlight important moments. Close-ups, slow motion, or strategic cutting can draw attention to key actions or emotions.
-
Unity: All shots should work together to tell a coherent story. Random cuts or mismatched angles can break the viewer’s immersion.
-
Variety: While unity is essential, variety in shot sizes, angles, and transitions keeps the audience engaged and prevents monotony.
-
Economy: Avoid over-editing. Each cut should serve a purpose. Removing unnecessary shots or frames keeps the video concise and impactful.
These laws form a framework that editors use to balance technical skill with storytelling. Mastering them allows you to create videos that are both visually appealing and narratively effective.
What are 321 rules of video editing?
The 321 rules of video editing are similar to the 321 rule described earlier but focus more broadly on structuring sequences for engagement. In this context, the rule provides guidance on cutting and pacing by emphasizing three key stages of a scene: setup, development, and climax.
-
3 – Establish: Start by introducing the environment, characters, or context. Use longer shots that help the audience understand the situation.
-
2 – Develop: Build the story or tension with mid-length shots that advance the narrative or show action progression.
-
1 – Deliver: End with a short, impactful shot that provides the climax or punchline of the sequence.
This framework ensures that every scene has a natural rhythm and flow. By applying the 321 approach across multiple scenes, editors can maintain audience interest, prevent pacing issues, and create a satisfying viewing experience. It’s particularly effective for short-form content, social media videos, and high-energy sequences where timing is critical.
What are the 5 C’s of editing?
The 5 C’s of editing are fundamental principles that help editors create coherent, engaging, and professional-looking videos. These concepts were popularized in film studies and are widely used in both cinema and digital media.
-
Cutting on Action: Transition between shots while maintaining the movement of characters or objects. This keeps motion smooth and makes the cut less noticeable.
-
Continuity: Ensure consistency in spatial and temporal relationships. Objects, positions, and actions should align between shots to maintain viewer immersion.
-
Close-ups: Use close-up shots strategically to emphasize emotions, reactions, or critical details, enhancing storytelling impact.
-
Composition: Consider the framing and arrangement of elements within each shot. Proper composition guides the viewer’s attention and strengthens visual storytelling.
-
Contrast: Use differences in shot size, lighting, or perspective to create visual interest and emphasize key story moments.
Mastering these 5 C’s allows editors to control viewer attention, strengthen narrative clarity, and produce videos that feel professional and engaging. They act as a blueprint for both beginners and advanced editors, providing guidance on when and how to cut or transition between shots effectively.
Can I self learn video editing?
Yes, self-learning video editing is entirely possible, and many successful editors started by teaching themselves. The key is dedication, structured practice, and utilizing the vast resources available online.
To begin, choose an editing software that suits your goals and experience level. Beginners often prefer free or intuitive tools like iMovie, DaVinci Resolve, or HitFilm Express. Professionals may eventually move on to advanced software such as Adobe Premiere Pro or Final Cut Pro.
Once your software is installed, start by familiarizing yourself with the interface. Learn where the timeline, media library, and basic tools are located.
Experimenting with simple projects, such as trimming clips, adding transitions, or overlaying text, helps build comfort and confidence. Many self-learners benefit from starting with short projects that focus on one aspect of editing at a time, gradually increasing complexity as skills improve.
Online tutorials and courses are invaluable for self-learners. Platforms like YouTube, Skillshare, and Udemy offer step-by-step instructions on a wide variety of editing techniques, from basic cuts to advanced color grading and motion graphics.
Following along with tutorials allows you to practice in a hands-on way, reinforcing what you learn immediately. Additionally, analyzing professional videos and trying to replicate their editing style can provide practical insight into pacing, transitions, and storytelling.
Practice is essential in self-learning. The more videos you edit, the faster your skills improve. Start small with personal projects or videos for friends and family, then gradually move on to more complex assignments.
It’s also helpful to join online communities or forums where editors share tips, critiques, and feedback. Constructive feedback can highlight areas for improvement that you may not notice on your own.
Finally, patience and persistence are key. Video editing involves both technical skills and creative judgment, which develop over time. Mistakes are part of the learning process, so experiment with different techniques and styles without fear of failure.
Over time, self-learners can reach professional levels, build a portfolio, and even work as freelance editors. By combining practice, study, and feedback, self-learning video editing becomes an achievable and rewarding journey.
What are the 4 C’s of editing?
The 4 C’s of editing are essential principles that guide editors in creating videos that are visually coherent, engaging, and easy to follow. These principles focus on both the technical and narrative aspects of editing, ensuring that cuts feel natural and the story is clear to the audience.
-
Continuity: This is about maintaining consistency in the visual and narrative elements between shots. Editors must ensure that objects, character positions, lighting, and movement align between scenes. Continuity prevents the audience from being distracted by inconsistencies and helps maintain immersion.
-
Cutting on Action: This principle involves making cuts while a subject is in motion. For example, if a character reaches for a door handle, cutting at the moment of movement keeps the transition smooth and natural. It creates a sense of flow and avoids jarring interruptions that can break the visual rhythm.
-
Close-ups: Strategic use of close-up shots can enhance emotional impact and emphasize important story details. Close-ups guide viewers’ attention to reactions, expressions, or objects that are significant for the narrative. Using them effectively ensures that the audience understands and connects with key moments.
-
Composition: This principle refers to the framing and arrangement of elements within each shot. Good composition directs the viewer’s eye, balances the scene visually, and supports storytelling. It considers factors like the rule of thirds, symmetry, depth, and perspective.
By mastering the 4 C’s, editors can produce videos that feel polished, coherent, and engaging. These principles serve as a practical foundation, especially for beginners, allowing them to make informed decisions about cuts, transitions, and shot selection.
What are the 12 basic steps of editing?
The 12 basic steps of editing provide a structured workflow that ensures a video project progresses smoothly from raw footage to a finished product. Following these steps helps editors maintain organization, creativity, and efficiency throughout the process.
-
Import Footage: Bring all your video clips, audio files, and images into your editing software.
-
Organize Media: Sort files into folders or bins for easy access, categorizing by scene, type, or importance.
-
Review Clips: Watch all footage and identify usable parts. This is called logging or selecting best takes.
-
Create a Rough Cut: Arrange clips in sequence to form the basic structure of the video.
-
Trim and Refine: Cut unnecessary portions, adjust timing, and refine the flow of each shot.
-
Add Transitions: Insert transitions between clips to improve continuity and visual flow.
-
Incorporate Audio: Add background music, sound effects, and voiceovers. Adjust levels for clarity and balance.
-
Color Correction: Adjust brightness, contrast, and color balance to ensure consistency between shots.
-
Add Effects and Graphics: Include titles, captions, visual effects, or overlays to enhance storytelling.
-
Fine-Tune Edits: Rewatch the video, checking for pacing, rhythm, and visual coherence. Make necessary adjustments.
-
Export the Video: Choose the appropriate format and resolution for your platform or audience.
-
Review and Revise: Watch the exported video and make any final changes to ensure quality and polish.
Following these steps provides a comprehensive framework that guides both beginners and experienced editors through the editing process, ensuring a professional and cohesive final product.
What is the golden rule of video editing?
The golden rule of video editing is “show, don’t tell.” This principle emphasizes that the visual content should convey the story, emotion, or information without relying excessively on narration or explanation. The goal is to let the footage itself communicate meaning, allowing the audience to experience the narrative rather than being told what to feel or think.
In practice, this means using techniques like cutting on action, employing close-ups for emotional impact, and selecting shots that clearly convey context and progression.
For instance, instead of explaining a character’s sadness through dialogue alone, a close-up of their expression, paired with a somber background and music, can communicate emotion more powerfully.
The golden rule also involves respecting pacing, continuity, and audience attention. Over-explaining or dragging out scenes can reduce engagement, while well-timed cuts and visual storytelling maintain interest. Essentially, the editor’s role is to guide the viewer seamlessly through the story using visuals, audio, and rhythm rather than relying solely on words.
By following this rule, editors create videos that feel natural, immersive, and emotionally resonant. It is a guiding principle that applies to all types of video content, from cinematic films to short-form social media clips.
What is the 5 second rule in video editing?
The 5-second rule in video editing is a guideline that suggests keeping individual shots or clips short, often around five seconds, especially in fast-paced content. This rule is particularly relevant for social media videos, advertisements, or sequences designed to grab and retain attention quickly.
The principle behind the 5-second rule is rooted in human attention span. Shorter clips prevent viewers from losing interest and encourage continuous engagement. By changing shots frequently, editors maintain visual momentum and create dynamic storytelling that feels energetic.
However, this rule is flexible. Not every clip must strictly follow five seconds; emotional, dramatic, or informative scenes may require longer shots to allow context and narrative depth. The rule serves more as a guideline for pacing rather than a rigid requirement.
Using the 5-second rule effectively involves balancing shot length with storytelling needs. Quick cuts can enhance excitement, but too many rapid transitions can confuse or fatigue viewers.
Experienced editors combine this principle with techniques like rhythmic cutting, visual variety, and continuity to create content that is both engaging and coherent.
Related